Preparing your data
We've prepared an example dataset in the `data` directory. If you'd like to move ahead with this tutorial with this example dataset, skip to the next section. If you'd like to prepare your own data, read on.
To use Nextstrain to analyze your own data, you’ll need to prepare two files:
A
fastafile with viral genomic sequencesA corresponding
tsvfile with metadata describing each sequence
We describe the following ways to prepare data for a SARS-CoV-2 analysis:
Prepare your own local data for quality control prior to submission to a public database.
Curate data from GISAID search and downloads to prepare a regional analyses based on local sequences identified through GISAID’s search interface and contextual sequences for your region from GISAID’s “nextregions” downloads.
Curate data from the full GISAID database to prepare a custom analysis by downloading the full database and querying for specific strains locally with Augur.
Prepare your own local data
Formatting your sequence data
The first 2 lines in data/sequences.fasta look like this:
>Wuhan-Hu-1/2019
ATTAAAGGTTTATACCTTCCCAGGTAACAAACCAACCAACTTTCGATCTCTTGTAGATC.....
The first line is the strain or name of the sequence.
Lines with names in FASTA files always start with the > character (this is not part of the name), and may not contain spaces or ()[]{}|#><.
Note that “strain” here carries no biological or functional significance and should largely be thought of as synonymous with “sample.”
The sequence itself is a consensus genome.
By default, sequences less than 27,000 bases in length or with more than 3,000 N (unknown) bases are omitted from the analysis.
For a basic QC and preliminary analysis of your sequence data, you can use clades.nextstrain.org.
This tool will check your sequences for excess divergence, clustered differences from the reference, and missing or ambiguous data. In addition, it will assign nextstrain clades and call mutations relative to the reference.
Formatting your metadata
Nextstrain accommodates many kinds of metadata, so long as it is in a TSV format.
A TSV is a text file, where each row (line) represents a sample and each column (separated by tabs) represents a field.
If you’re unfamiliar with TSV files, don’t fret; it’s straightforward to export these directly from Excel, which we’ll cover shortly.
Here’s an example of the first few columns of the metadata for a single strain, including the header row. (Spacing between columns here is adjusted for clarity, and only the first 6 columns are shown).
strain              virus  gisaid_epi_isl  genbank_accession   date        region   ...
NewZealand/01/2020  ncov   EPI_ISL_413490  ?                   2020-02-27  Oceania  ...
See the reference guide on metadata fields for more details.
Required metadata
A valid metadata file must include the following fields:
| Field | Example value | Description | Formatting |
|---|---|---|---|
strain or name |
Australia/NSW01/2020 |
Sample name / ID | Each header in the fasta file must exactly match a strain value in the metadata. Characters ()[]{}|#>< are disallowed |
date |
2020-02-27, 2020-02-XX, 2020-XX-XX |
Date of sampling | YYYY-MM-DD; ambiguities can be indicated with XX |
virus |
ncov |
Pathogen name | Needs to be consistent |
region |
Africa, Asia, Europe, North America, Oceania or South America |
Global region of sampling |
Please be aware that our current pipeline will filter out any genomes with an unknown date - you can change this in your own pipeline.
Missing metadata
Missing data is to be expected for certain fields.
In general, missing data is represented by an empty string or a question mark character.
There is one important difference: if a discrete trait reconstruction (e.g. via augur traits) is to be run on this column, then a value of ? will be inferred, whereas the empty string will be treated as missing data in the output. See below for how to represent uncertainty in sample collection date.
General formatting tips
The order of the fields doesn’t matter; but if you are going to join your metadata with the global collection then it’s easiest to keep them in the same order!
Not all fields are currently used, but this may change in the future.
Data is case sensitive
The “geographic” columns, such as “region” and “country” will be used to plot the samples on the map. Adding a new value to these columns isn’t a problem at all, but there are a few extra steps to take; see the customization guide.
You can color by any of these fields in the Auspice visualization. Which exact columns are used, and which colours are used for each value is completely customisable; see the customization guide.
Formatting metadata in Excel
You can also create a TSV file in Excel. However, due to issues with auto-formatting of certain fields in Excel (like dates), we don’t recommend this as a first option. If you do edit a file in Excel, open it afterwards in a text editor to check it looks as it should.
Create a spreadsheet where each row is a sample, and each column is a metadata field
Ensure your spreadsheet meets the requirements outlined above. Pay special attention to date formats; see this guide to date formatting in Excel.
Click on
File > Save asChoose
Text (Tab delimited) (*.txt)and enter a filename ending in.tsv
Curate data from GISAID search and downloads
The following instructions describe how to curate data for a region-specific analysis (e.g., identifying recent introductions into Washington State) using GISAID’s “Search” page and curated regional data from the “Downloads” window. Inferences about a sample’s origin strongly depend on the composition of your dataset. For example, discrete trait analysis models cannot infer transmission from an origin that is not present in your data. We show how to overcome this issue by adding previously curated contextual sequences from Nextstrain to your region-specific dataset.
Login to GISAID
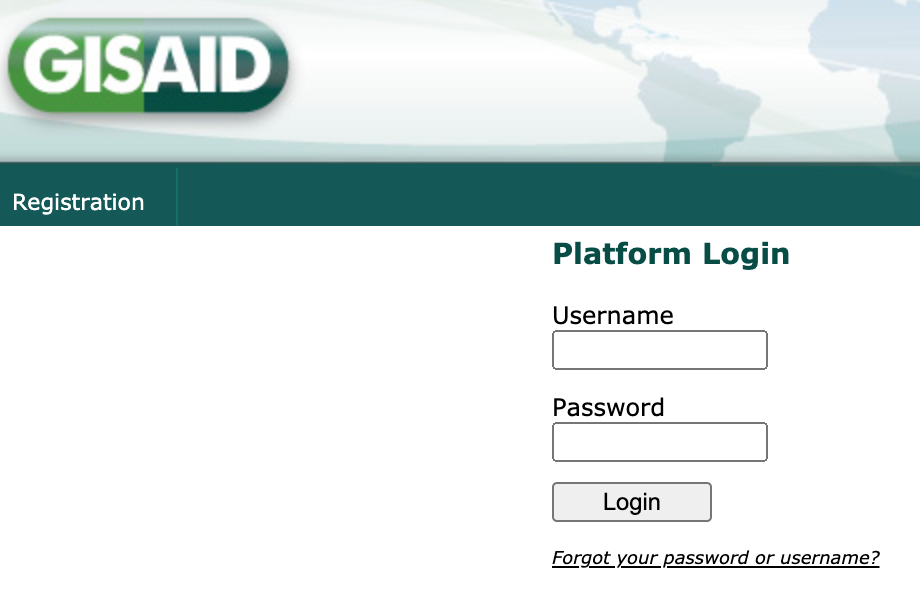
Navigate to GISAID (gisaid.org) and select the “Login” link.

Login to your GISAID account. If you do not have an account yet, register for one (it’s free) by selecting the “Registration” link.
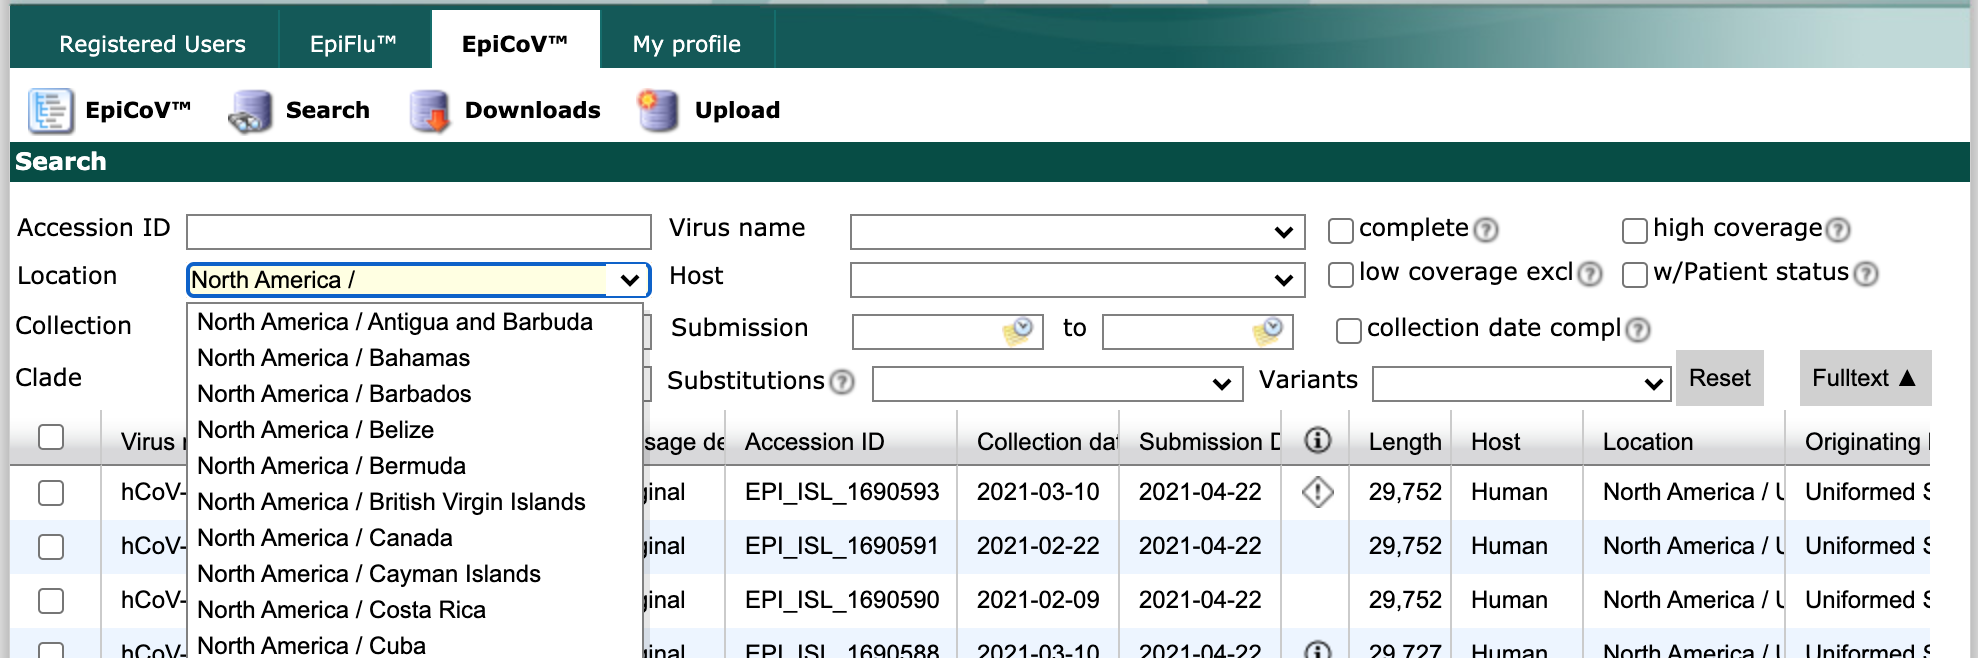
Select “EpiCoV” from the top navigation bar.

Search for region-specific data
Select “Search” from the EpiCoV navigation bar.

Find the “Location” field and start typing “North America /”. As you type, the field will suggest more specific geographic scales.
Finish by typing “North America / USA / Washington”. Select all strains collected between May 1 and June 1 with complete genome sequences and collection dates. Click the checkbox in the header row of the results display, to select all strains that match the search parameters.
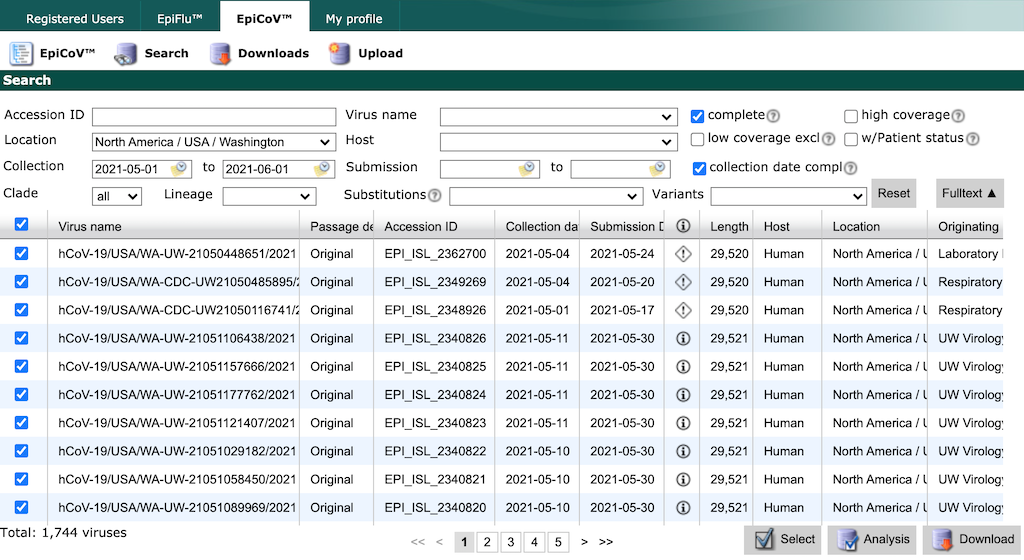
GISAID limits the number of records you can download at once to 5000. If you need to download more records, constrain your search results to smaller windows of time by collection date and download data in these smaller batches.
Select the “Download” button in the bottom right of the search results. There are two options to download data from GISAID, both of which we describe below.
Option 1: Download “Input for the Augur pipeline”
From the resulting “Download” window, select “Input for the Augur pipeline” as the download format.
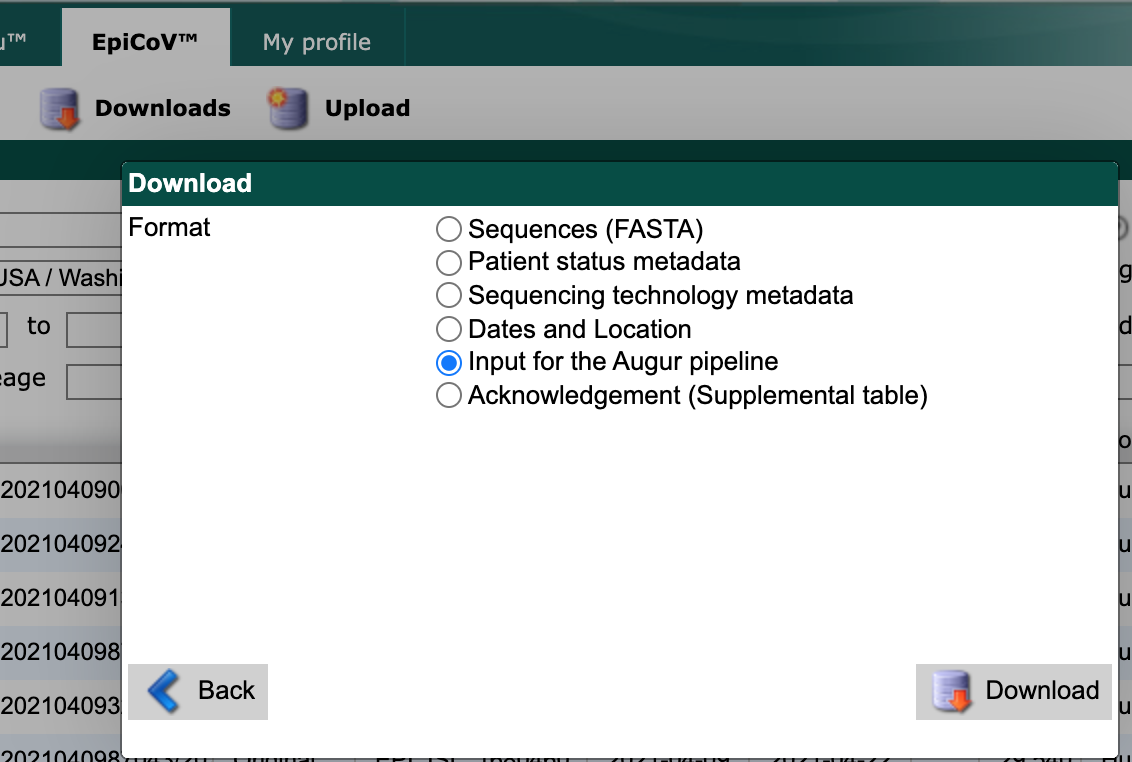
Select the “Download” button and save the resulting file to the data/ directory with a descriptive name like gisaid_washington.tar.
This tar archive contains compressed metadata and sequences named like 1622567829294.metadata.tsv.xz and 1622567829294.sequences.fasta.xz, respectively.
You can use this tar file as an input for the Nextstrain workflow, as shown below.
The workflow will extract the data for you.
Create a new configuration file, builds.yaml, in the top-level of the ncov directory that defines your analysis or “builds”.
# Define inputs for the workflow.
inputs:
  - name: washington
    # The workflow will detect and extract the metadata and sequences
    # from GISAID tar archives.
    metadata: data/gisaid_washington.tar
    sequences: data/gisaid_washington.tar
Next, you can move on to the heading below to get contextual data for your region of interest.
Alternately, you can extract the tar file into the data/ directory prior to analysis.
tar xvf data/gisaid_washington.tar
Rename the extracted files to match the descriptive name of the original archive.
mv data/1622567829294.metadata.tsv.xz data/gisaid_washington_metadata.tsv.xz
mv data/1622567829294.sequences.fasta.xz data/gisaid_washington_sequences.fasta.xz
You can use these extracted files as inputs for the workflow.
# Define inputs for the workflow.
inputs:
  - name: washington
    # The workflow also accepts compressed metadata and sequences
    # from GISAID.
    metadata: data/gisaid_washington_metadata.tsv.xz
    sequences: data/gisaid_washington_sequences.fasta.xz
Option 2: Download “Sequences” and “Patient status metadata”
Alternately, you can download sequences and metadata as two separate uncompressed files.
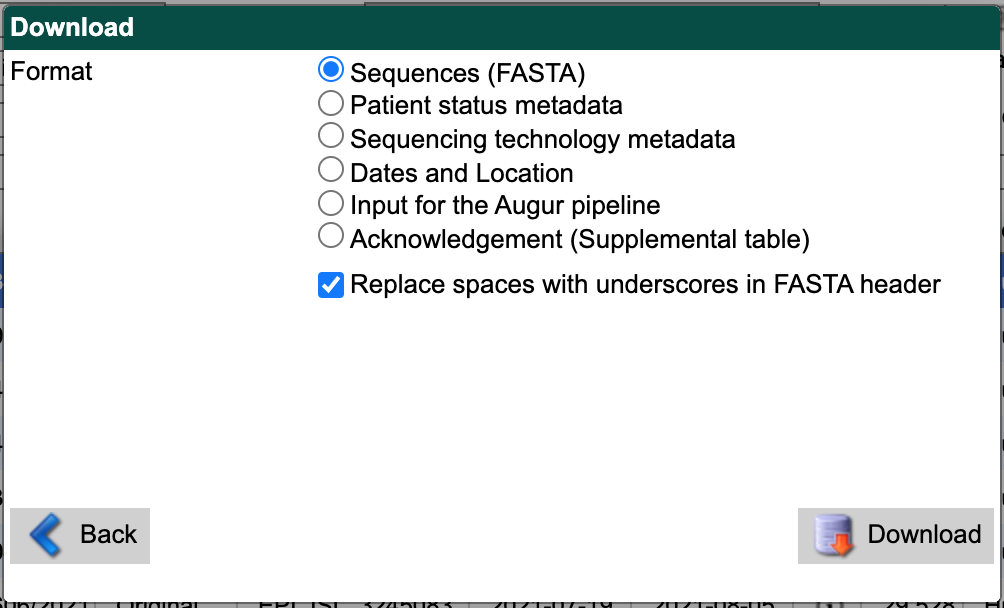
First, select “Sequences (FASTA)” as the download format.
Check the box for replacing spaces with underscores.
Select the “Download” button and save the resulting file to the data/ directory with a descriptive name like gisaid_washington_sequences.fasta.
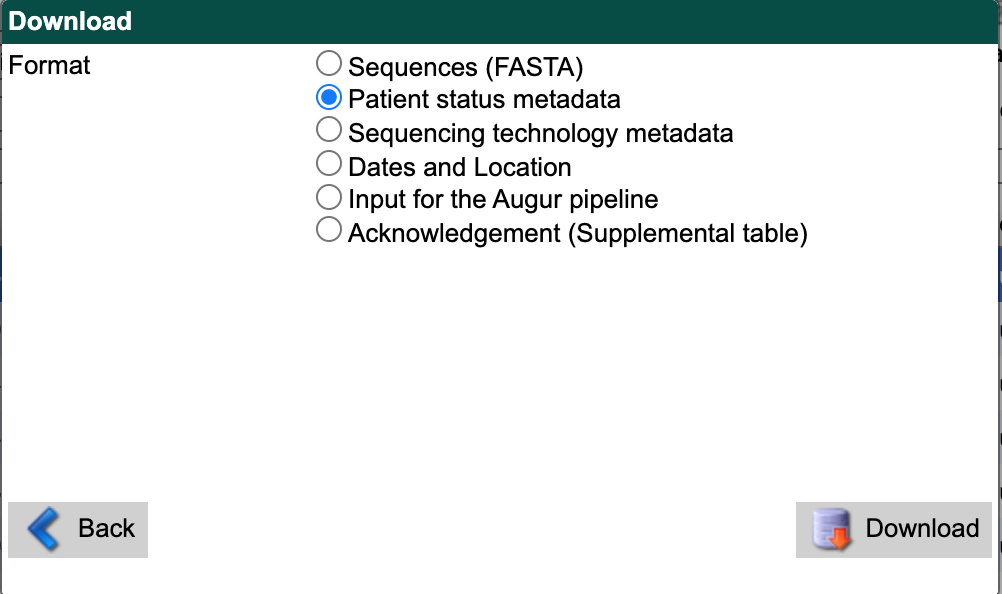
From the search results interface, select the “Download” button in the bottom right again.
Select “Patient status metadata” as the download format.
Select the “Download” button and save the file to data/ with a descriptive name like gisaid_washington_metadata.tsv.
You can use these files as inputs for the workflow like so.
# Define inputs for the workflow.
inputs:
  - name: washington
    metadata: data/gisaid_washington_metadata.tsv
    sequences: data/gisaid_washington_sequences.fasta
Download contextual data for your region of interest
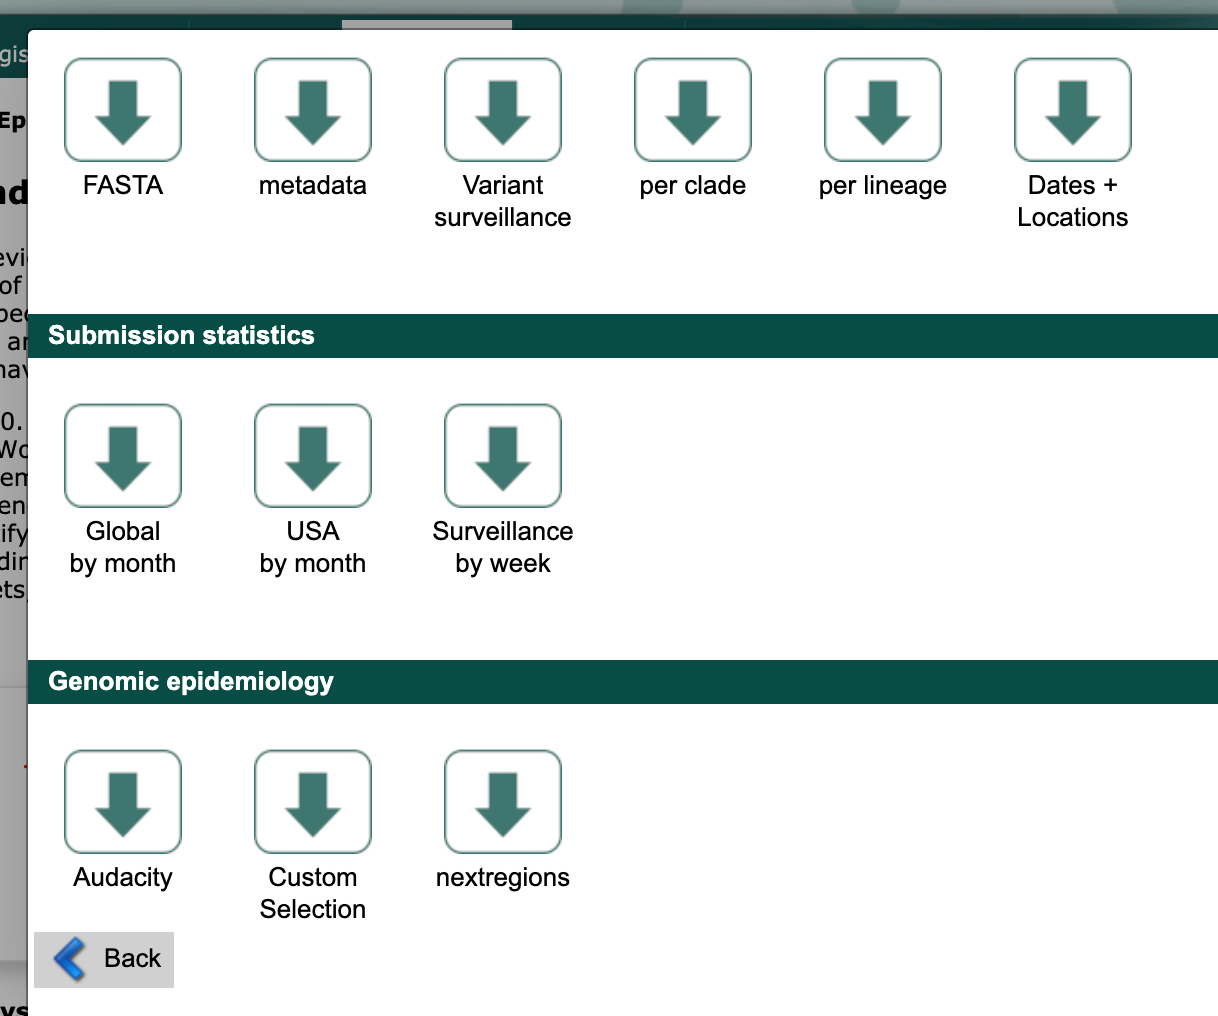
Next, select the “Downloads” link from the EpiCoV navigation bar.

Scroll to the “Genomic epidemiology” section and select the “nextregions” button.
Select the major region that corresponds to your region-specific data above (e.g., “North America”).
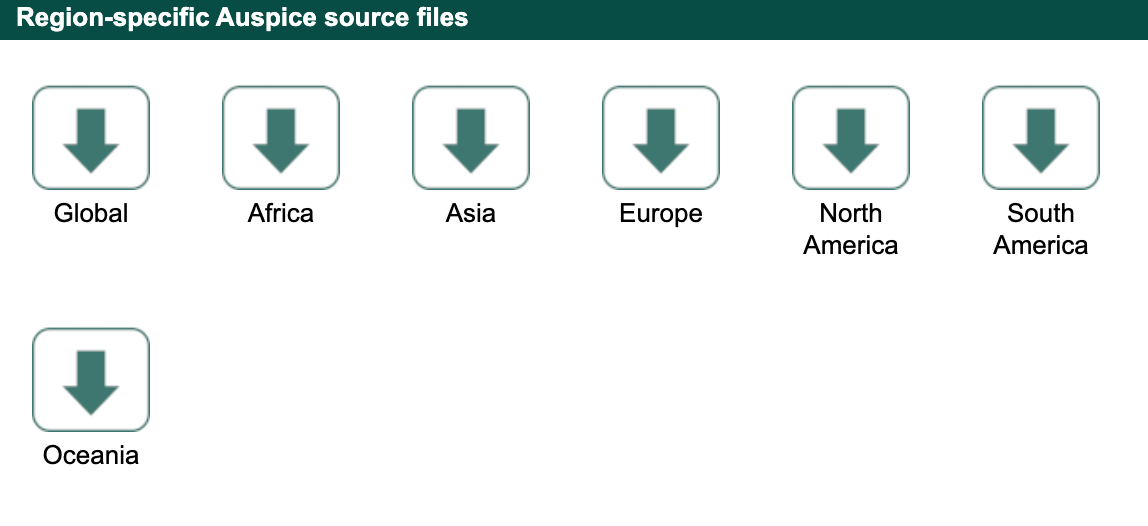
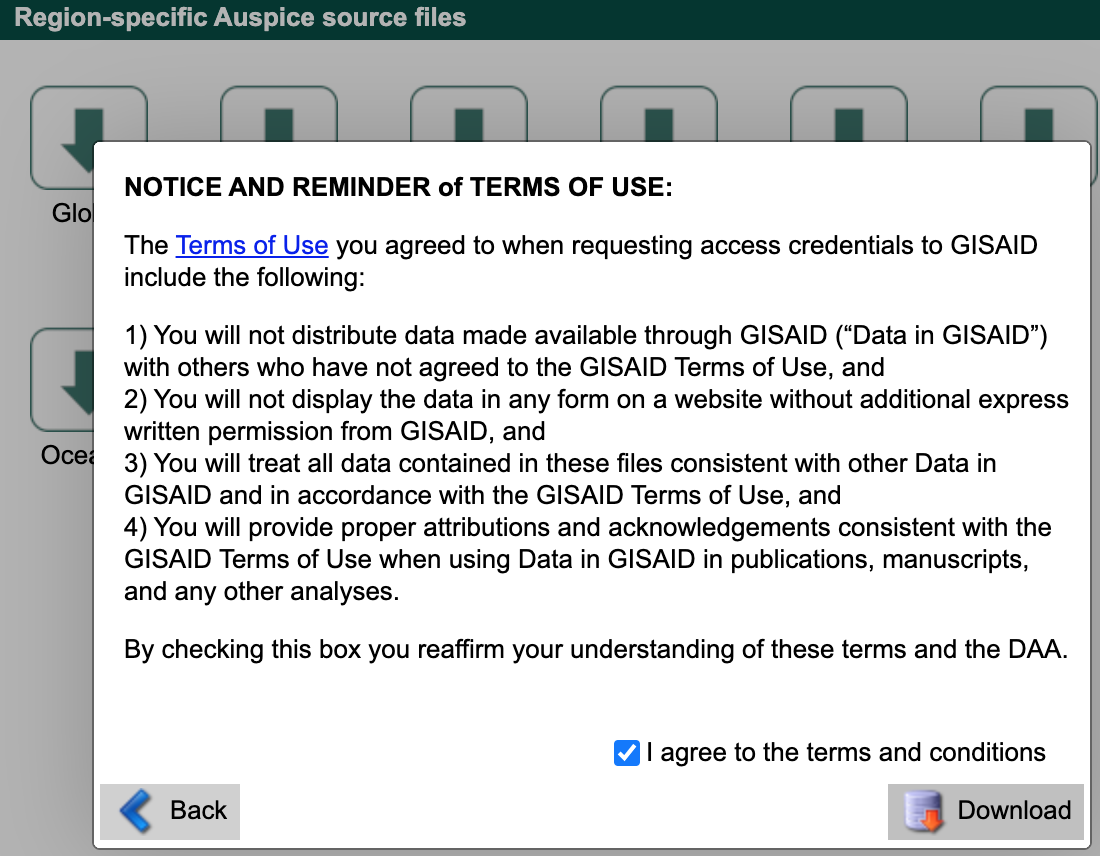
Agree to the terms and conditions and download the corresponding file (named like ncov_north-america.tar.gz) to the data/ directory.
This compressed tar archive contains metadata and sequences corresponding to a recent Nextstrain build for that region with names like ncov_north-america.tsv and ncov_north-america.fasta, respectively.
For example, the “North America” download contains data from Nextstrain’s North America build.
These regional Nextstrain builds contain data from a specific region and contextual data from all other regions in the world.
By default, GISAID provides these “nextregions” data in the “Input for the Augur pipeline” format.
As with the tar archive from the search results above, you can use the “nextregions” compressed tar archives as input to the Nextstrain workflow and the workflow will extract the appropriate contents for you.
For example, you could update your inputs in the builds.yaml file from above to include the North American data as follows.
# Define inputs for the workflow.
inputs:
  - name: washington
    # The workflow will detect and extract the metadata and sequences
    # from GISAID tar archives.
    metadata: data/gisaid_washington.tar
    sequences: data/gisaid_washington.tar
  - name: north-america
    # The workflow will similarly detect and extract metadata and
    # sequences from compressed tar archives.
    metadata: data/ncov_north-america.tar.gz
    sequences: data/ncov_north-america.tar.gz
Alternately, you can extract the data from the compressed tar archive into the data/ directory.
tar zxvf data/ncov_north-america.tar.gz
You can use these extracted files as inputs for the workflow.
# Define inputs for the workflow.
inputs:
  - name: washington
    # The workflow will detect and extract the metadata and sequences
    # from GISAID tar archives.
    metadata: data/gisaid_washington.tar
    sequences: data/gisaid_washington.tar
  - name: north-america
    # The workflow supports uncompressed or compressed input files.
    metadata: data/ncov_north-america.tsv
    sequences: data/ncov_north-america.fasta
By default, the workflow will use all distinct sequences to create a phylogeny without any subsampling. You now have all of the data you need to run your analysis and can continue to the next section of the tutorial.
Curate data from the full GISAID database
Some analyses require custom subsampling of the full GISAID database to most effectively understand SARS-CoV-2 evolution. For example, analyses that investigate specific variants or transmission patterns within localized outbreaks benefit from customized contextual data. These specific searches can easily exceed the 5000-record download limit from GISAID’s search interface and the diversity of data available in the Nextstrain “nextregions” downloads.
The following instructions describe how to curate data for a region-specific analysis using the full GISAID sequence and metadata files. As with the curation process described above, we describe how to select contextual data from the rest of the world to improve estimates of introductions to your region. This type of analysis also provides a path to selecting contextual data that are as genetically similar as possible to your region’s data.
In this example, we will select the following subsets of GISAID data:
all data from Washington State in the last two months
a random sample of data from North America (excluding Washington) in the last two months
a random sample of data from outside North America in the last six months
Download all SARS-CoV-2 metadata and sequences from GISAID
The following instructions assume you have already registered for a free GISAID account, logged into that account, and selected the “EpiCoV” link from the navigation bar, as described above. Select the “Downloads” link from the EpiCoV navigation bar.
Find the “Download packages” section and select the “FASTA” button.
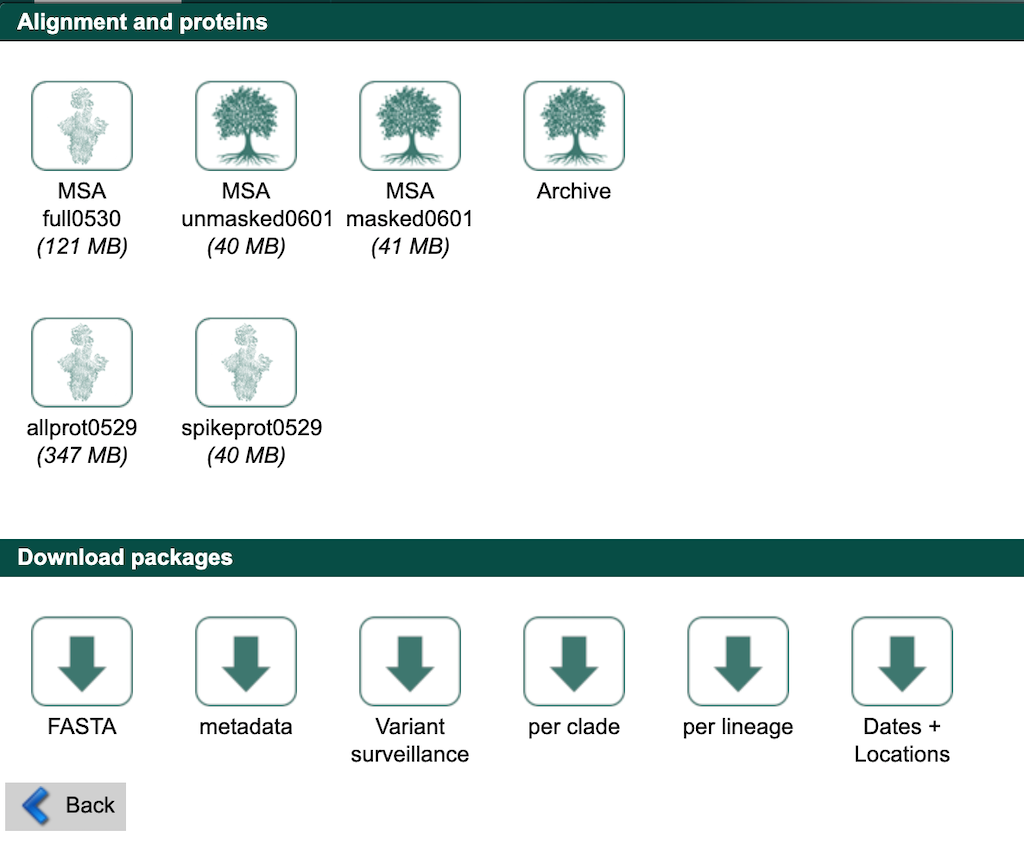
Agree to the terms and conditions and download the corresponding file (named like sequences_fasta_2021_06_01.tar.xz) to the data/ directory.
Next, select the “metadata” button from that same “Download packages” section and download the corresponding file (named like metadata_tsv_2021_06_01.tar.xz) to the data/ directory.
If "FASTA" or "metadata" options do not appear in the "Download packages" window, use the "Contact" link in the top-right of the GISAID website to request access to these files.
We use these data in our official Nextstrain builds.
If you have sufficient computing resources, you can use these files as inputs for the workflow in a builds.yaml like the one described above.
However, the workflow starts by aligning all input sequences to a reference and this alignment can take hours to complete even with multiple cores.
As an alternative, we show how to select specific data from these large files prior to starting the workflow.
Prepare GISAID data for Augur
Nextstrain’s bioinformatics toolkit, Augur, does not support GISAID’s default formatting (e.g., spaces are not allowed in sequence ids, additional metadata in the FASTA defline is unnecessary, “hCoV-19/” prefixes are not consistently used across all databases, composite “location” fields in the metadata are not tab-delimited, etc.). As a result, the workflow includes tools to prepare GISAID data for processing by Augur.
First, prepare the sequence data. This step strips prefixes from strain ids in sequence records, removes whitespace from the strain ids, removes additional metadata in the FASTA defline, and removes duplicate sequences present for the same strain id.
python3 scripts/sanitize_sequences.py \
    --sequences data/sequences_fasta_2021_06_01.tar.xz \
    --strip-prefixes "hCoV-19/" \
    --output data/sequences_gisaid.fasta.gz
To speed up filtering steps later on, index the sequences with Augur. This command creates a tab-delimited file describing the composition of each sequence.
augur index \
    --sequences data/sequences_gisaid.fasta.gz \
    --output data/sequence_index_gisaid.tsv.gz
Next, prepare the metadata.
This step resolves duplicate records for the same strain name using GISAID’s Accession ID field (keeping the record with the latest id), parses the composite Location field into region, country, division, and location fields, renames special fields to names Augur expects, and strips prefixes from strain names to match the sequence data above.
python3 scripts/sanitize_metadata.py \
    --metadata data/metadata_tsv_2021_06_01.tar.xz \
    --database-id-columns "Accession ID" \
    --parse-location-field Location \
    --rename-fields 'Virus name=strain' 'Accession ID=gisaid_epi_isl' 'Collection date=date' \
    --strip-prefixes "hCoV-19/" \
    --output data/metadata_gisaid.tsv.gz
Select region-specific data
Select data corresponding to your region of interest.
In this example, we select strains from Washington State collected between April 1 and June 1, 2021.
The --query argument of the augur filter command supports any valid pandas-style queries on the metadata as a data frame.
augur filter \
    --metadata data/metadata_gisaid.tsv.gz \
    --query "(country == 'USA') & (division == 'Washington')" \
    --min-date 2021-04-01 \
    --max-date 2021-06-01 \
    --exclude-ambiguous-dates-by any \
    --output-strains strains_washington.txt
The output is a text file with a list of strains that match the given filters with one name per line. As of June 1, 2021, the corresponding output contains 8,193 strains.
Select contextual data for your region of interest
Select a random sample of recent data from your region’s continent. In this example, we will randomly sample 1,000 strains collected between April 1 and June 1, 2021 from North American data, excluding data we’ve already selected from Washington.
augur filter \
    --metadata data/metadata_gisaid.tsv.gz \
    --query "(region == 'North America') & (division != 'Washington')" \
    --min-date 2021-04-01 \
    --max-date 2021-06-01 \
    --exclude-ambiguous-dates-by any \
    --subsample-max-sequences 1000 \
    --output-strains strains_north-america.txt
Select a random sample of recent data from the rest of the world. Here, we will randomly sample 1,000 strains collected between December 1, 2020 and June 1, 2021 from all continents except North America. To evenly sample all regions through time, we also group data by region, year, and month and sample evenly from these groups.
augur filter \
    --metadata data/metadata_gisaid.tsv.gz \
    --query "region != 'North America'" \
    --min-date 2020-12-01 \
    --max-date 2021-06-01 \
    --exclude-ambiguous-dates-by any \
    --subsample-max-sequences 1000 \
    --group-by region year month \
    --output-strains strains_global.txt
Extract metadata and sequences for selected strains
Now that you’ve selected a subset of strains from the full GISAID database, extract the corresponding metadata and sequences to use as inputs for the Nextstrain workflow.
augur filter \
    --metadata data/metadata_gisaid.tsv.gz \
    --sequence-index data/sequence_index_gisaid.tsv.gz \
    --sequences data/sequences_gisaid.fasta.gz \
    --exclude-all \
    --include strains_washington.txt strains_north-america.txt strains_global.txt \
    --output-metadata data/subsampled_metadata_gisaid.tsv.gz \
    --output-sequences data/subsampled_sequences_gisaid.fasta.gz
You can use these extracted files as inputs for the workflow.
# Define inputs for the workflow.
inputs:
  - name: subsampled-gisaid
    metadata: data/subsampled_metadata_gisaid.tsv.gz
    sequences: data/subsampled_sequences_gisaid.fasta.gz
Subsampling
We’ve outlined several methods for subsampling, including builds with a focus area and genetically similar contextual sequences, in the section on customizing your analysis.