Setup and installation
The following steps will prepare you to run complete analyses of SARS-CoV-2 data by installing required software and running a simple example workflow.
1. Install Nextstrain components
Follow instructions to install Nextstrain components here.
Note
If using the native runtime, install these additional packages necessary to run the ncov workflow. Make sure the correct conda environment is activated.
mamba install -c conda-forge -c bioconda epiweeks nextclade nextalign pangolin pangolearn
2. Download the ncov workflow
Download the workflow
Use Git to download a copy of the ncov repository containing the workflow and this tutorial.
git clone https://github.com/nextstrain/ncov.git
cd ncov
Alternately, download a compressed copy of the ncov repository called ncov-master.zip. Open this file to decompress it and create a directory called ncov-master/ with the contents of the workflow in it. Navigate to this directory from the command line.
Update the workflow
We update the official workflow regularly with:
curated metadata including latitudes/longitudes, clade annotations, and low quality sequences
bug fixes
Update your local copy of the workflow, to benefit from these changes.
# Download and apply changes from the Nextstrain team.
# This only works if there is no conflict with your local repository.
git pull --ff-only origin master

# OR:

# Alternately, download and apply changes from the Nextstrain team
# and then replay your local changes on top of those incoming changes.
git pull --rebase origin master
Alternately, download a specific version of the workflow that you know works for you. We create new releases of the workflow any time we introduce breaking changes, so you can choose when to update based on what has changed.
# Download version 7 (v7) of the workflow.
curl -OL https://github.com/nextstrain/ncov/archive/refs/tags/v7.zip

# Uncompress the workflow.
unzip v7.zip

# Change into the workflow's directory.
cd ncov-7/
3. Run a basic analysis with example data
Run a basic workflow with example data, to confirm that your Nextstrain runtime is properly configured.
nextstrain build . --cores 4 \
  --configfile ./my_profiles/getting_started/builds.yaml
The nextstrain build command runs a pathogen workflow defined using Snakemake. Since our Snakefile is in the current directory, we specify the directory as .. All other arguments pass through to Snakemake.
The getting_started build produces a minimal global phylogeny for visualization in Auspice. This workflow should complete in about 5 minutes on a MacBook Pro (2.7 GHz Intel Core i5) with four cores.
4. Visualize the phylogeny for example data
Open auspice.us in your browser. Drag and drop the JSON file auspice/ncov_global.json anywhere on the landing page, to visualize the resulting phylogeny. The resulting phylogeny should look something like this:
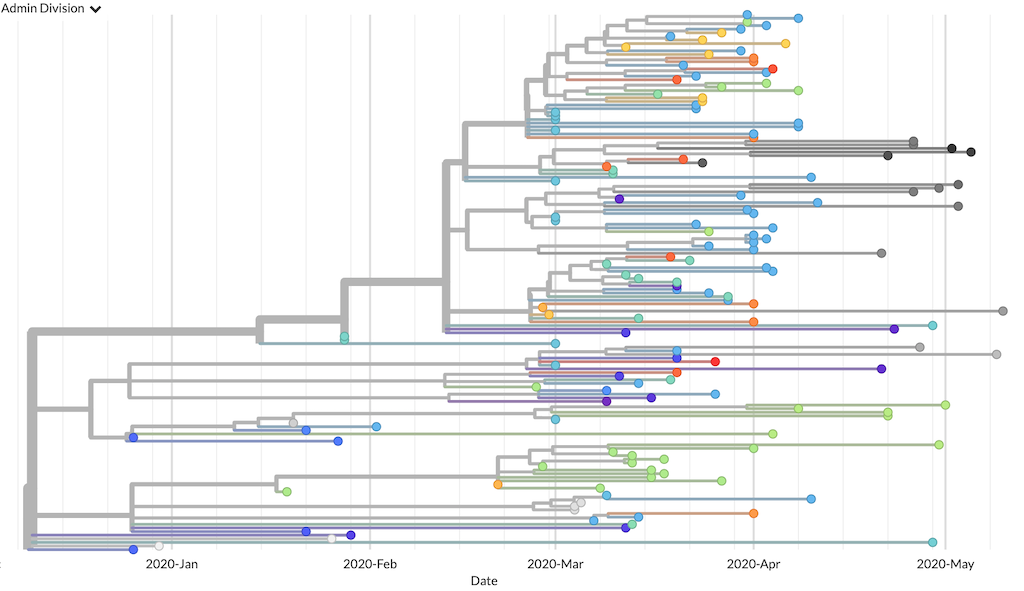
Phylogenetic tree from the “getting started” build as visualized in Auspice